FIONA BLACK | TEACHING PORTFOLIO
STAINED GLASS PANELS
LESSON PLAN
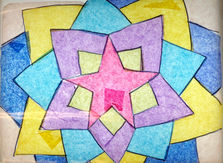
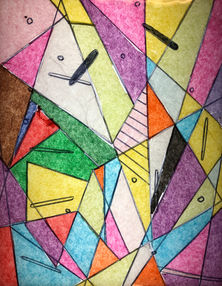
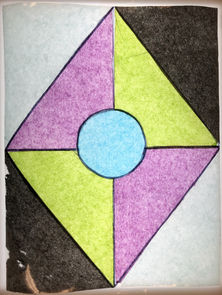
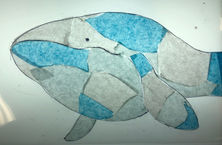
STUDENT WORK
Stained Glass Windows
Fiona Black
Unit of Study: Color and Light
Subject: Art
Grade: 8th
*Lesson can be adapted to work with younger students but materials may vary.
The Big Idea:
Student will create their own design for a 'stained glass window' and learn about color and the effects of light.
Specific Essential Questions addressed in this lesson:
Where might one see a stained glass window? What kinds of colors are used? How does the light affect those colors?
Learning Outcomes/Expectations/Objectives:
As a result of this lesson, students will understand that light can affect how color is seen, and can help change how certain art pieces look.
As a result of this lesson students will know that stained glass is an art form used most commonly in architecture.
As a result of this lesson students will be able to make their own “stained glass window” using tissue paper and clear laminate paper.
Learning Activities:
Introduction (5 minutes)
Introduce students to stained glass windows [Do you know what a stained glass window is? Have you ever seen one before? Where might you see them? What colors did you see in it? How does the light affect those colors?]. Show a slideshow with examples of stained glass windows (show both abstract and representational examples so students feel comfortable creating either one). Explain to students the importance of planning out their work beforehand by sketching first. Remind students about thumbnail sketches and why they are a helpful tool for planning. Encourage students to draw at least three rough thumbnail sketches before choosing one and moving on to the larger sketch.
Demonstration (5 minutes)
Show students how to place the clear paper over their final sketch and tape it down to the table so they are able to trace with a sharpie. Then show them how to place tissue paper over the sharpie lines to trace the piece with a pencil, to then cut out and glue down. Remind students that very small pieces will be harder to cut out, and that they should be gluing their tissue paper pieces down one at a time so as not to let the glue dry before securing the tissue paper.
Transition students over to their tables to begin working. Put up step-by-step reminders on the board for all to see while they work.
Activity (35 minutes)
Students begin working on their sketches, and follow steps as they go.
Clean up (5 minutes)
Give students 10 and 5 minute warnings before clean up begins, then remind them to wash their glue brushes and put their work on the drying rack.
Closure (5 minutes) *For when project is done [length is 4-5 classes]
Have students bring their work up to tape to the window and see what it looks like with the light coming through. If students wish to discuss their piece, they can do so during this time.
*OPTIONAL TEACHER PREP: If you have access to a laminator, laminate student's work when it's finished so as to limit the risk of the work being damaged.
Materials needed for the lesson:
-
sketch paper [2-3 per student]
-
pencils [1 per student]
-
scissors [1 per student]
-
liquid glue and cups [1 per every two students]
-
flathead paintbrushes (.5 inch wide at most) [1 per student]
-
sharpies [1 per student]
-
clear paper [1 sheet per student]
-
variety of colored tissue paper
-
masking tape
Teacher Materials needed for demonstration:
-
1 sheet of sketch paper
-
pencil
-
sharpie
-
tissue paper
-
scissors
-
1 sheet of laminate paper
-
glue cup
-
paintbrush
-
masking tape
-
laminator (optional)


